
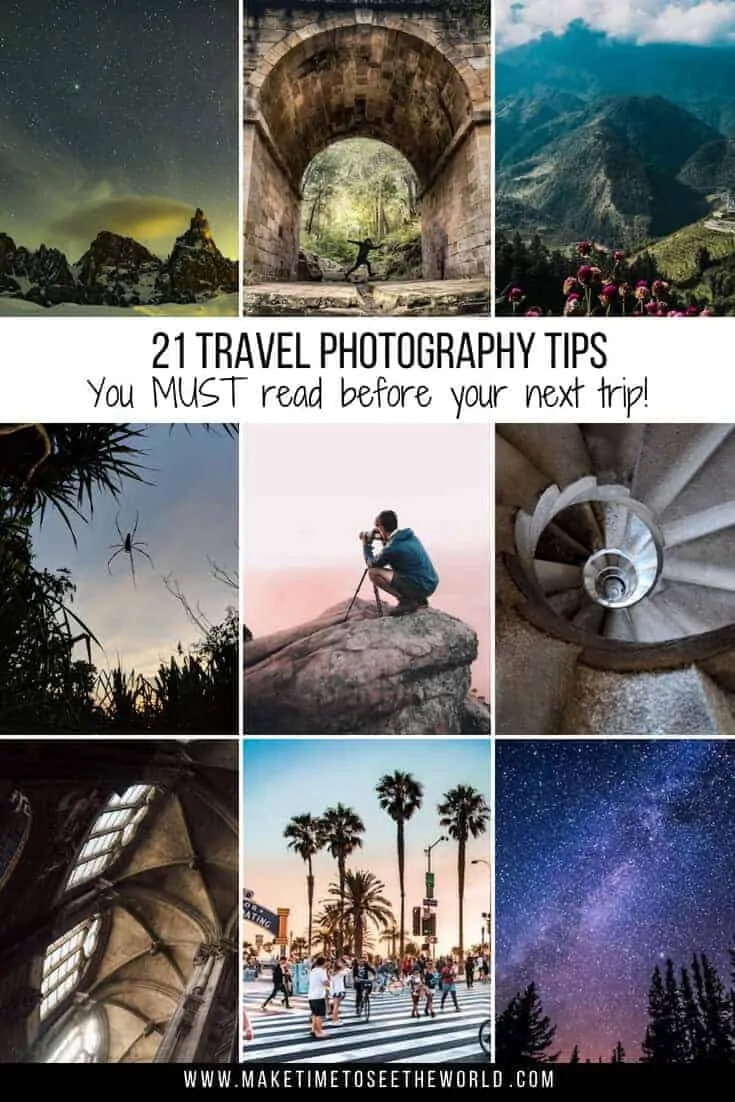
For many of us, getting the most out of our traveling means returning with photos—lots of photos. And while some may be content with just taking quick snaps and moving on, many of us would really like our photos to uniquely capture the spirit of the place we’re visiting. But to that well, we need to know a bit about the style(s) of photography we gravitate most to, as each has its own unique travel photography tips and tricks.
Below you’ll find the top five most popular travel photography styles accompanied by tips that can really make a difference in the quality of your photos. You might be someone who enjoys all five types, or you might specialize in one or two. Either way, these travel photography tips will set you well on your way towards getting fantastic shots.
Post written in partnership with Max of PhotoGeeky
In This Post
Landscape Photography Tips
Few styles of photography grant solace to the wandering soul like landscape photography. It invites us to seek out the wild, lonely places of the world. It can also be challenging to do well.
Shoot During the Golden and Blue Hours
Any professional photographer will tell you that lighting is one of the most important elements to landing a great shot, and with landscapes the most superb lighting occurs during the golden and blue hours of the day. The golden hour is the hour just after the sun has risen or just before setting, when the light is warm, soft, and creating pleasant shadows. The blue hour is the hour just before dawn or just after sunset, when the light is fading but not yet fully dark. This is when some of the most glorious sunrise/sunset effects happen. It’s also the best time to photograph cities, as there is still light in the sky yet the lights in the city are also on. Both of these hours will make for stellar shots. Conversely, the worst time to shoot is at noon (unless it’s a cloudy day), as you’ll get some harsh, unwelcoming light.
.
Invest in a Traveler’s Tripod
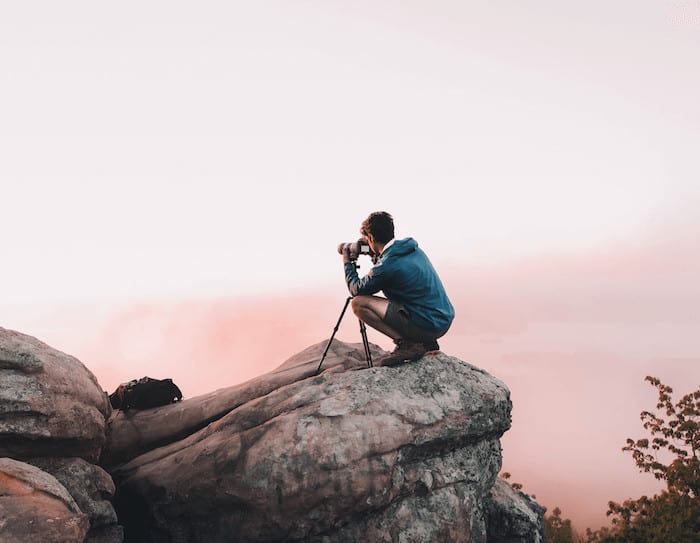
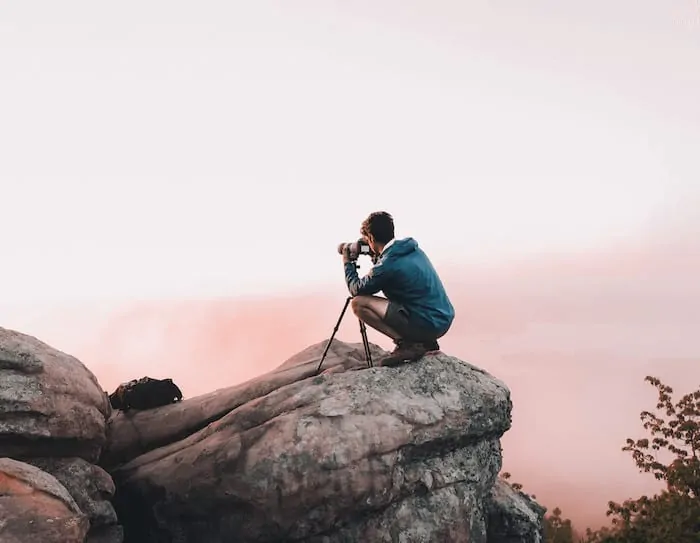 Some of the most dramatic landscapes can only be captured with longer exposures. Blue hour, night time, and HDR photography will all need some form of camera stabilization, yet traditional tripods are both heavy and bulky. That’s where a traveler tripod comes in. Traveler tripods range from the small, flexible like the Gorilla Pod (which will fit in a small daypack), to the larger, near full-size tripods that are built light and collapse into a small bundle meant for traveling. Which tripod you choose to add to your travel photography gear will depend on your budget, photography style, and the types of places you like to travel to, but having one will open up huge vistas of photographic opportunity for you.
.
Don’t Forget to Use the Foreground
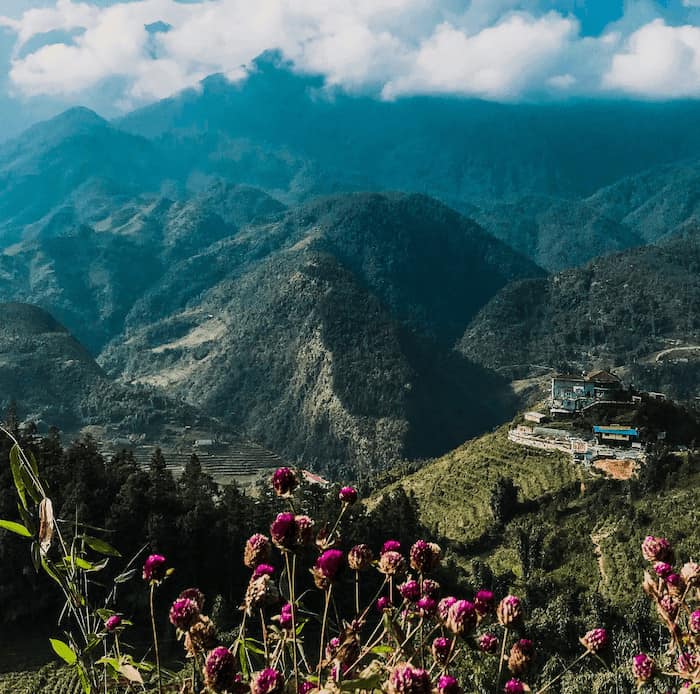
 It’s often challenging to capture that beauty in a 2-dimensional photo without something in the foreground to help put things in perspective. Incorporating a strong foreground into your photo will not only give context to the larger scene, it will also lend a sense of depth to your image that can be the difference between a flat, boring snapshot and an exceptional photo. Look for leading lines, interesting rocks, hill formations, or even just flowers. Just make sure that the elements you want to be sharp are in focus (which might mean using a higher f-stop).
.
Architectural Photography Tips
If you love traveling, you’re probably not immune to the immense beauty that lies in some of the world’s human-made structures. Whether you like the technical aspects, the culture it represents, or just admire a fine building, it’s hard to avoid wanting to land some great architecture shots.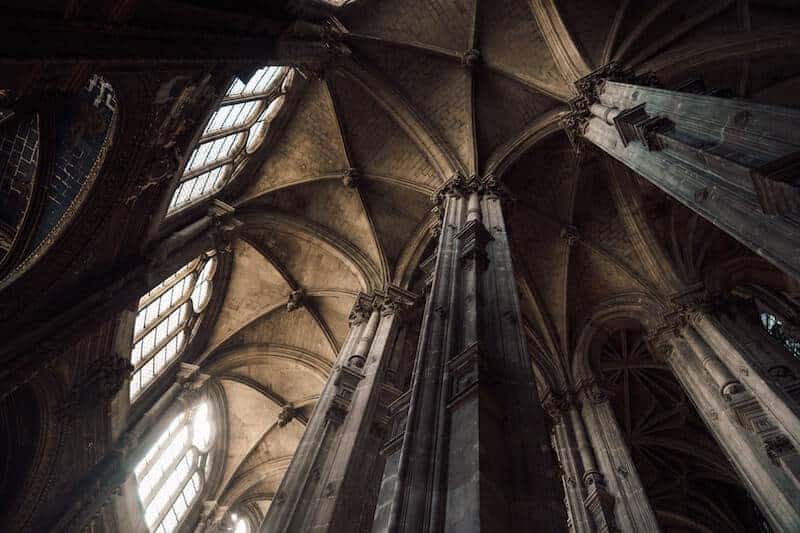
Watch Your Lines
One of the most challenging aspects to photographing buildings is making sure the lines go where they’re supposed to. Often we’re looking up at architectural elements, and that can cause the vertical lines to start to converge, making the building look like it’s falling backwards. If you find this happening, try stepping back from the building or moving to a higher point of view. Also make sure you edit your photos in a program that fixes lens distortions. This will often clear up lines that you thought were straight but came out crooked once you’ve clicked the shutter.
.
Don’t Forget the Human Element
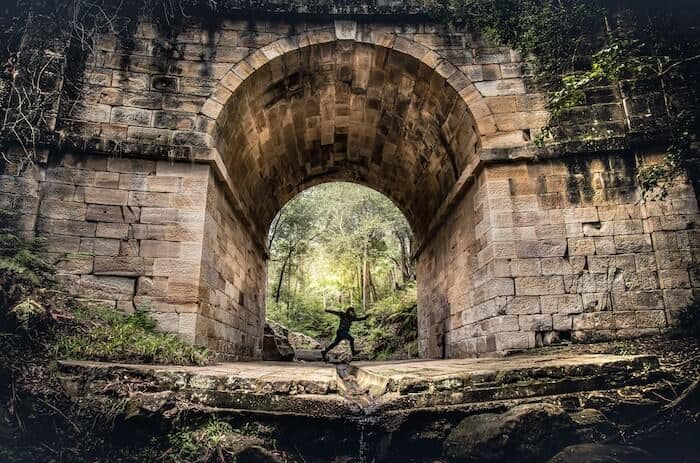
 Most travel photographers try to avoid having people in their architectural images, yet including them can really add a whole other dimension to your image. After all, buildings were designed for and by people, and if we really want to capture the spirit of a place, then it makes sense to see it from the perspective of those living and working in it. On a practical level, including people will lend a sense of scale and depth to the image.
.
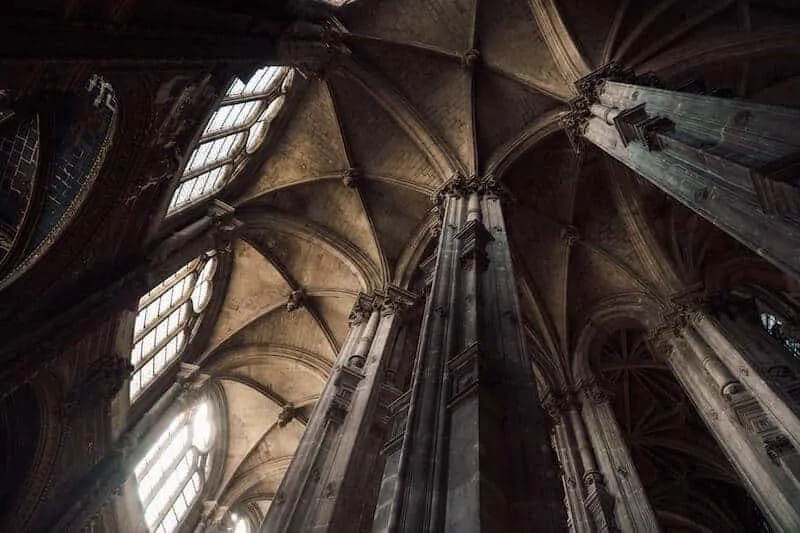
Explore the Details

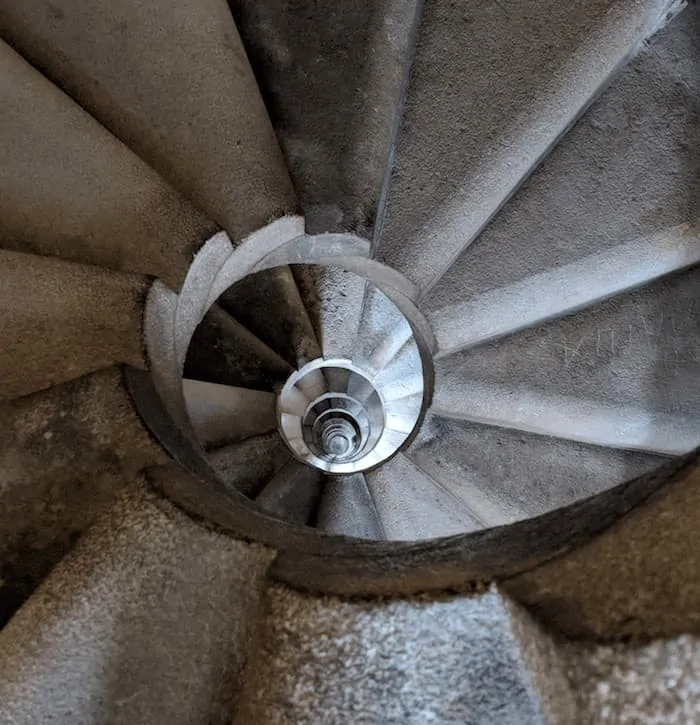 If you’re looking for a more unique shot, trying capturing the individual elements of a building. There are often plenty of details and geometric patterns in even the simplest of structures, whether built in or a product of light and shadow. Notice how the lines interact with each other, how the light illuminates textures, where the shadows fall. A little bit of exploration might not only grant you some fantastic shots, but may also lead you to discover something new or interesting about the building’s construction or history.
.
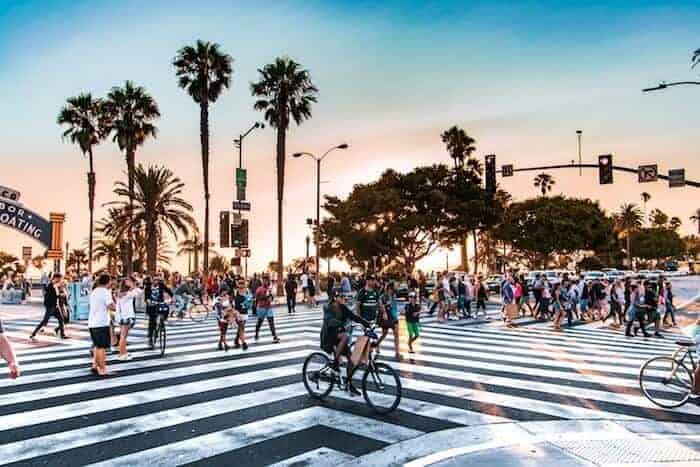
Street Photography Tips
Street photography and traveling are pretty much a match made in heaven. Wandering the streets of a strange town or city is one of the primary pleasures of traveling, and capturing the real-life stories of the streets can be some of the most meaningful photos you bring back.
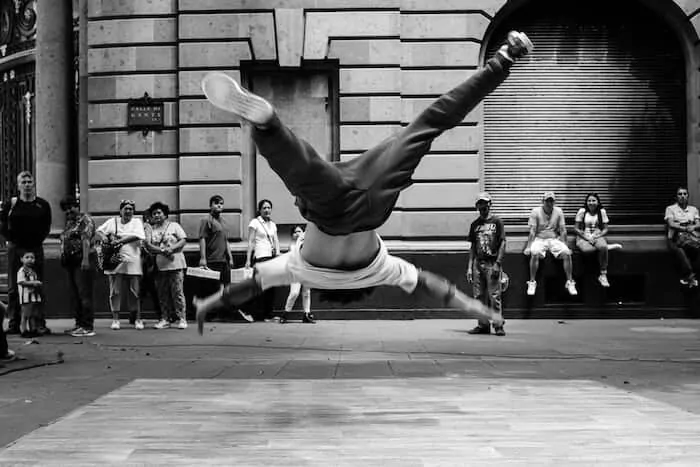
Find a Good Spot and Wait
Contrary to popular thought, one of the most tried and true methods of street photography is to find an interesting spot, compose your shot, and spend time waiting for something interesting to happen. One of the early masters of street photography, Henri Cartier-Bresson, often waited hours for what he called “the decisive moment.” But whether you wait for half an hour while you sip a coffee or lie in wait for hours, you’ll probably find this style of street photography less invasive than other forms, as the subject will be entering your space, not the other way around. You’ll also be more prepared, which means more opportunity to land the shot successfully.
.
Be Respectful
While capturing truly candid moments is at the heart of most street photography, it’s important to remember that not everyone wants their photo taken or to have their image bouncing around on social media. So while everyone in a public space may seem like fair game (which is legally true in the US), both individuals and cultures as a whole may not appreciate the “shoot from the hip” method or other forms of surreptitious photography. From focusing on the whole scene to creating a connection with your subjects, there are many unobtrusive ways to capture real life on the streets, and if you are in doubt about a shot, try and talk to people that are identifiable and ask their permission if you plan to publish it. It may not always be practical, but it something to consider.
.
Have Your Camera Easily Accessible
 There’s nothing like seeing something amazing (or even merely interesting) happen directly in front of you and not being able to get your camera out in time to capture it. The solution? Always have your camera handy. If you’re not wanting to lug around a bulky DSLR, consider investing in a lighter camera—the best street images aren’t amazing because of their megapixels, but because of their content and composition. Conversely, if you love your DSLR, try investing in a camera bag that gives you super-quick access. (Take a look at Peak Design’s Everyday Backpack for inspiration.)
.
Aerial Photography Tips
Aerial photography through drones is one of the newest and most exciting forms of travel photography, yet it also has some unique challenges.

Be Sure to Choose the Right Gear
Believe it or not, drones actually do come in a size that you can take with you on a trip, but you’ll need to do your research to find the one that’s right for you. The larger, more expensive ones will be able to take better photos, but tend to be, well, large. (And therefore hard to pack.) If you want one that fits in your bag, consider models like the DJI Spark or the GoPro Karma. Both are reasonably priced and can fit into just about any travel bag.
.
Stay Charged Up
Like with any electronic device, having enough battery power and some to spare can prevent a lot of mishaps. While a single drone battery can cover a lot of territory, it’s always a good idea to have at least one backup. This will not only give you peace of mind, it will also allow you to potentially go beyond the flight you first imagined, opening up new vistas. Just be aware that flying with drone batteries can be a bit problematic. They can’t be checked in luggage on commercial flights and lithium polymer (LiPo) batteries will need to be drained before being carried into the passenger cabin. You’ll also want to remember any travel adapters or converters you’ll need for juicing up in other countries.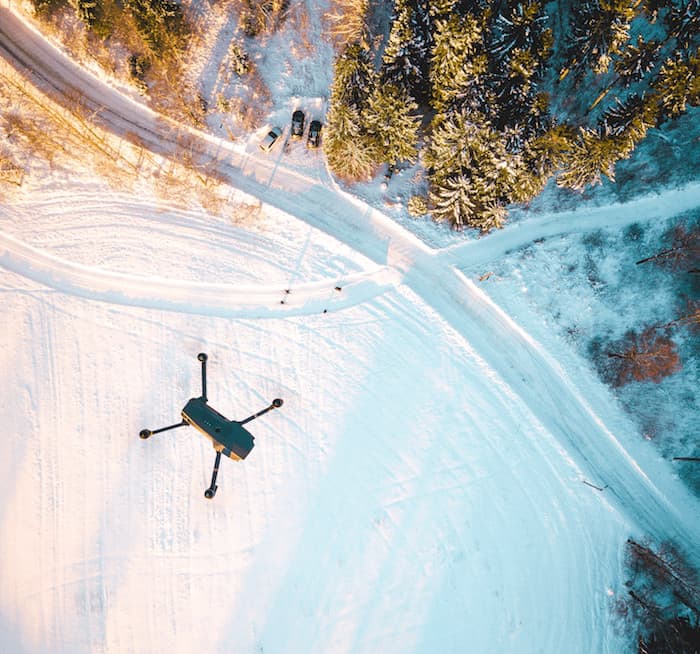

Use Auto Exposure Bracketing
While there are plenty of technical things to be aware of with drones, there are also a few unique photographic challenges. The first of which is nailing the correct exposure—especially when all you have is your smartphone to judge what the picture will look like. This is where auto exposure bracketing comes in (AEB). Cameras set to AEB take two or more images at different exposures, one of which is likely to be correct (or closer to correct). Also, taking multiple exposures will also allow you to use HDR to add more dynamic range to your photos.
.
Astrophotography Tips
Believe it or not, astrophotography is not just about stars. It’s about landscapes—and travel.
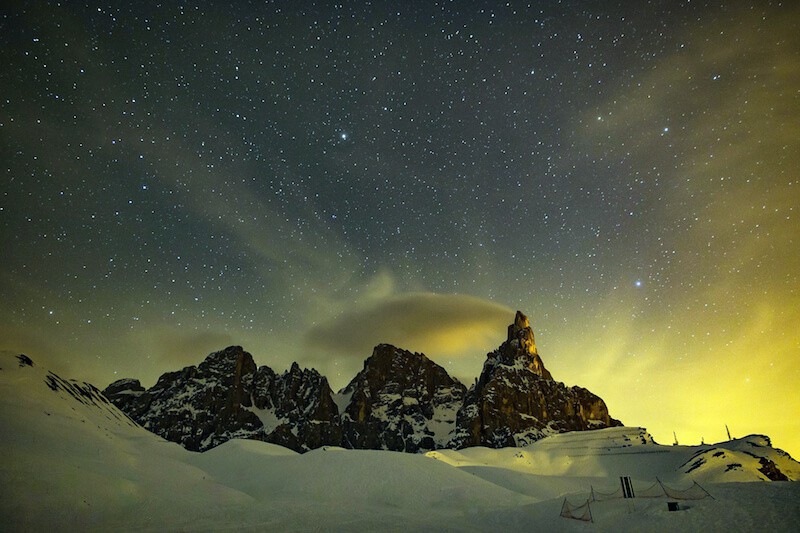
Darkness is Key
One of the most important things you need to land those solid Milky Way shots is a dark sky, and for most of us that means traveling. Check out resources like Darkskyfinder and this list of parks from around the world from the International Dark-Sky Association both in the US and internationally. Also, make sure you plan your shots around the new moon, as the full moon’s light is too overwhelming for the majority of star shots.
.
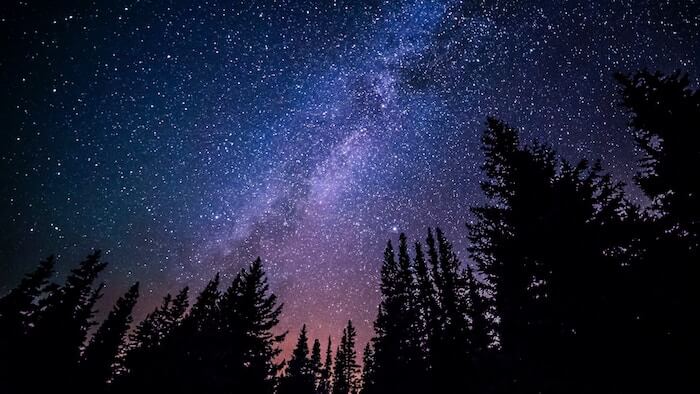
Focus
There are a few different ways to get a tack-sharp focus in astrophotography, but if you’re a beginner, it’s often easiest to begin by focusing on the brightest star. Set your camera to manual mode and place the brightest star in view. From there, magnify by 5X, and then by 10X. Adjust the focus ring until you get the star as small as possible yet still in focus. From there, take some test shots and adjust.
.
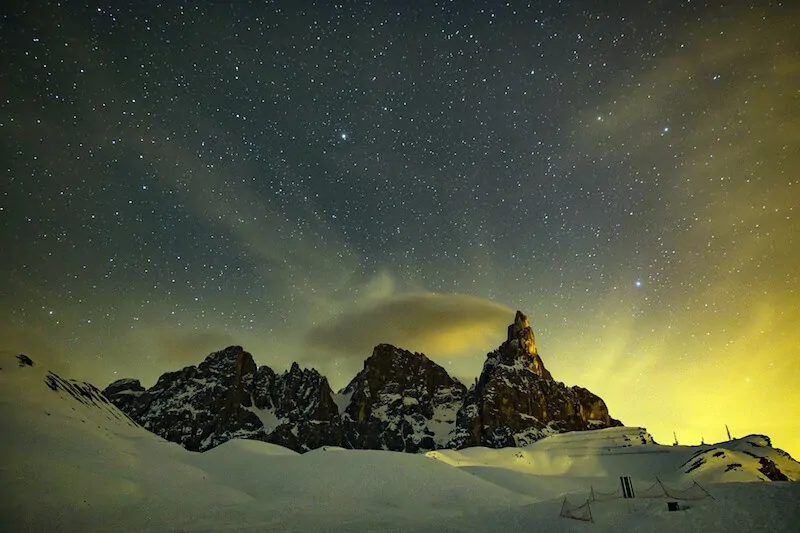
Choose the Correct Exposure
 One of the unique things about astrophotography is that after a certain exposure length with the camera in a fixed position, the stars will start to have tails. This can be a beautiful effect, but if you’re wanting a clear, crisp Milky Way, you’ll need to calculate your shutter speed and exposure time to stop just before star trails form. The more advanced way is by using the “500 rule” (500 Divided By the Focal Length of Your Lens = The Longest Exposure (in Seconds) Before Stars Start to “Trail”), but if you just want to go about with trial and error, try starting at 23 seconds with an ISO of 1600 and dialing back from there.
.
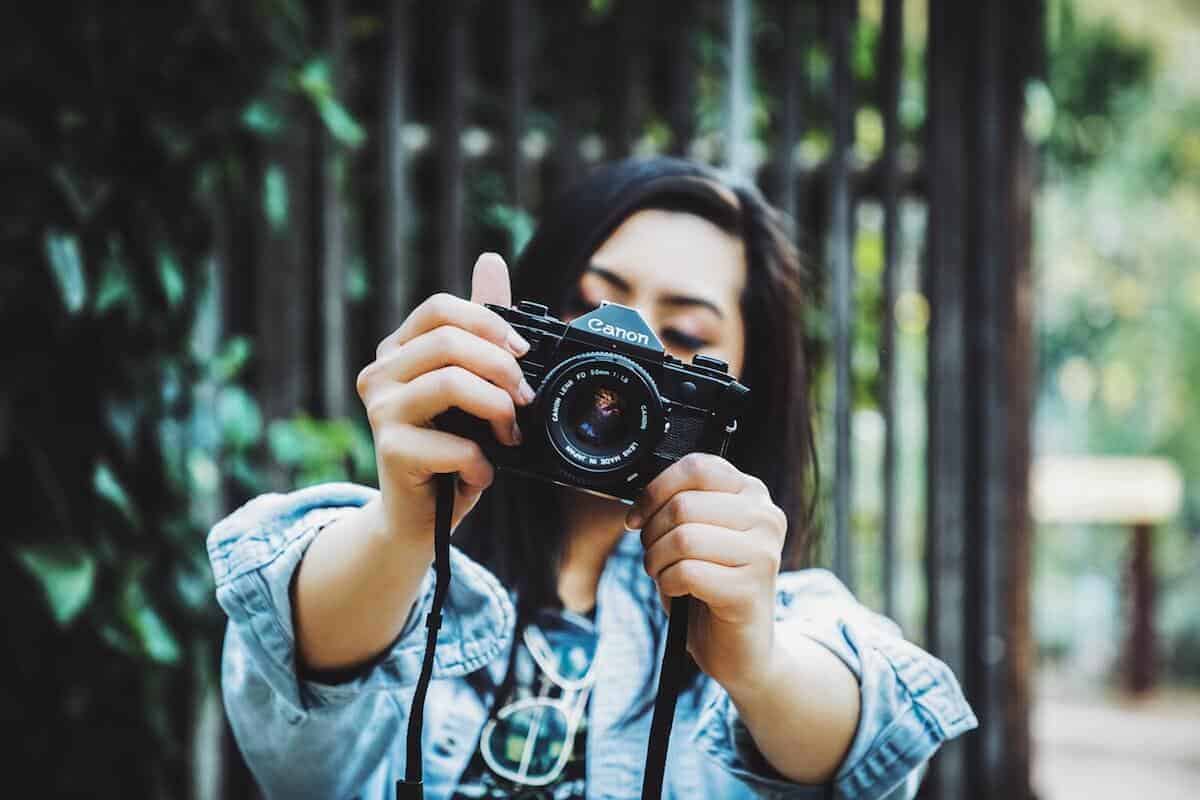
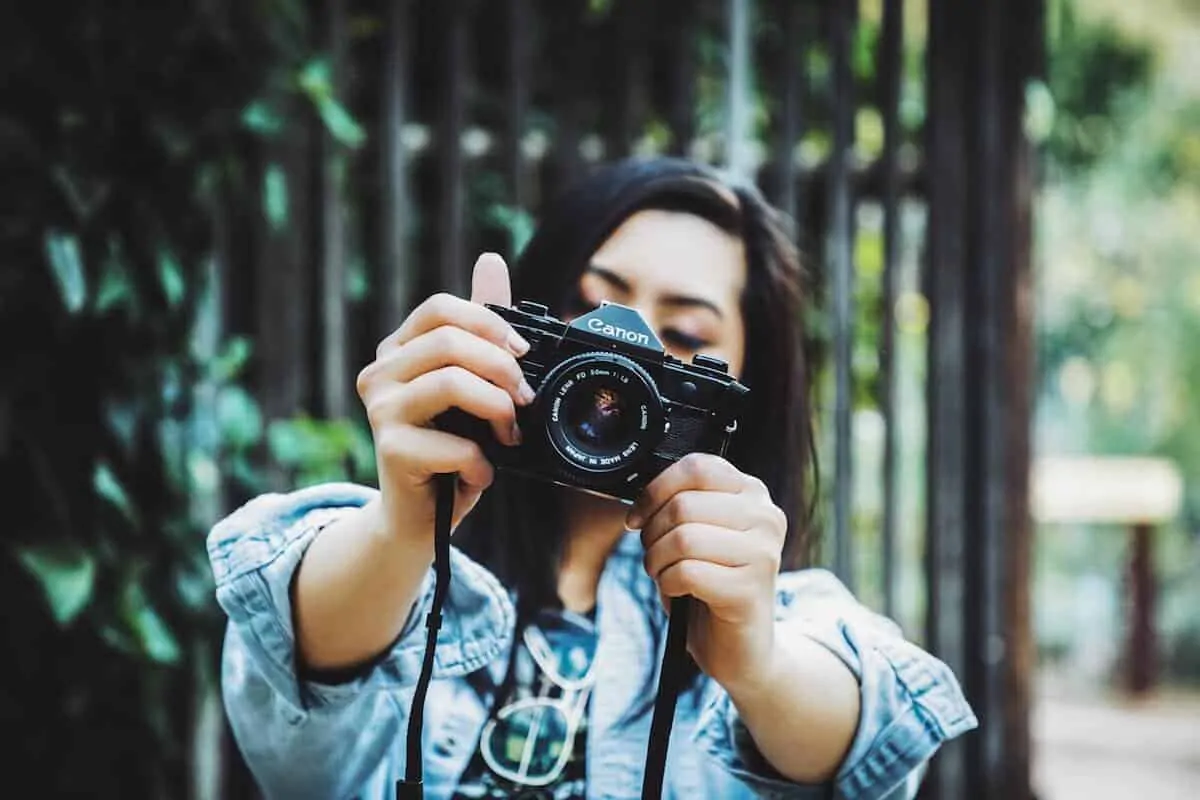
Portrait Photography
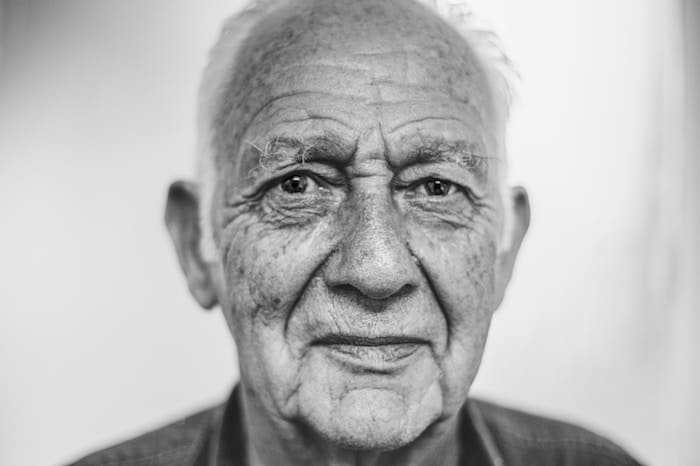
Look Your Subject in the Eye
The eyes are a great place to focus your photos – whether you can see them or not!
By focusing on the subjects eyes and capturing the light you help bring life to the image and if taking portraits of children get down to their eye level to produce a more natural shot (rather than them looking up).
You can experiment with having your subject looking directly into the camera or looking at something beyond the camera to create a sense of intrigue, or removing the traditional ‘eye’ element completely whilst still focusing at eye level (below).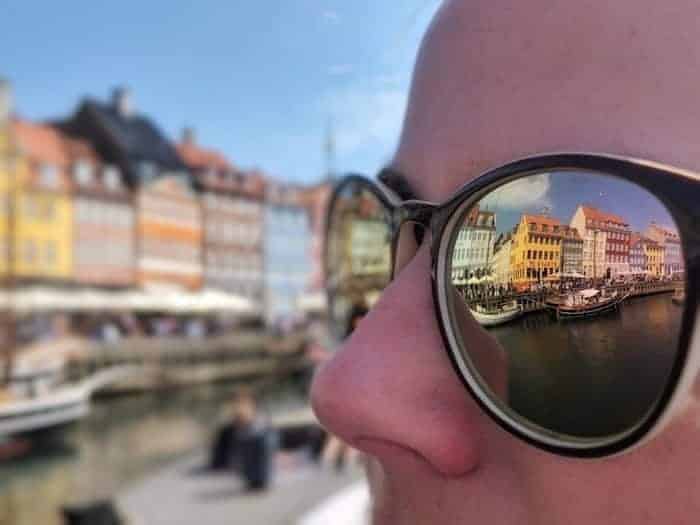

Backgrounds and Framing
The background can make a huge difference a portrait shot. Bright colours, stark whites, muted blacks etc but the background doesn’t have to be everything. If you can’t find what you are looking to use try and incorporate branches or other natural elements in the foreground of the frame for a different effect. If you can’t find either, be sure to use a wide angle lens and a longer focal length to blur your frame so all focus still falls on your subject (which is just what portrait mode does on various smartphones like the IPhone (7+ and above), Samsung Galaxy 9 or Google Pixel 2!)
.
Get Close To Your Subject
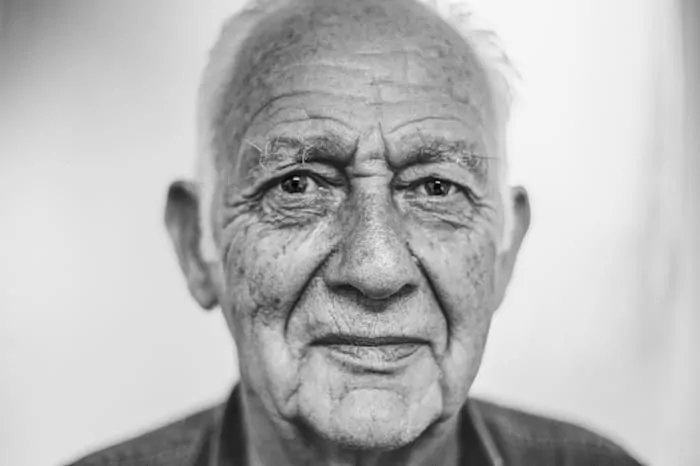 You’re allowed the break the rules of composition (shoot with reference to the rule of thirds) when it comes to shooting portraits. Placing your subject dead center or right at the edge can create a dramatic effect.
.
Wildlife Photography
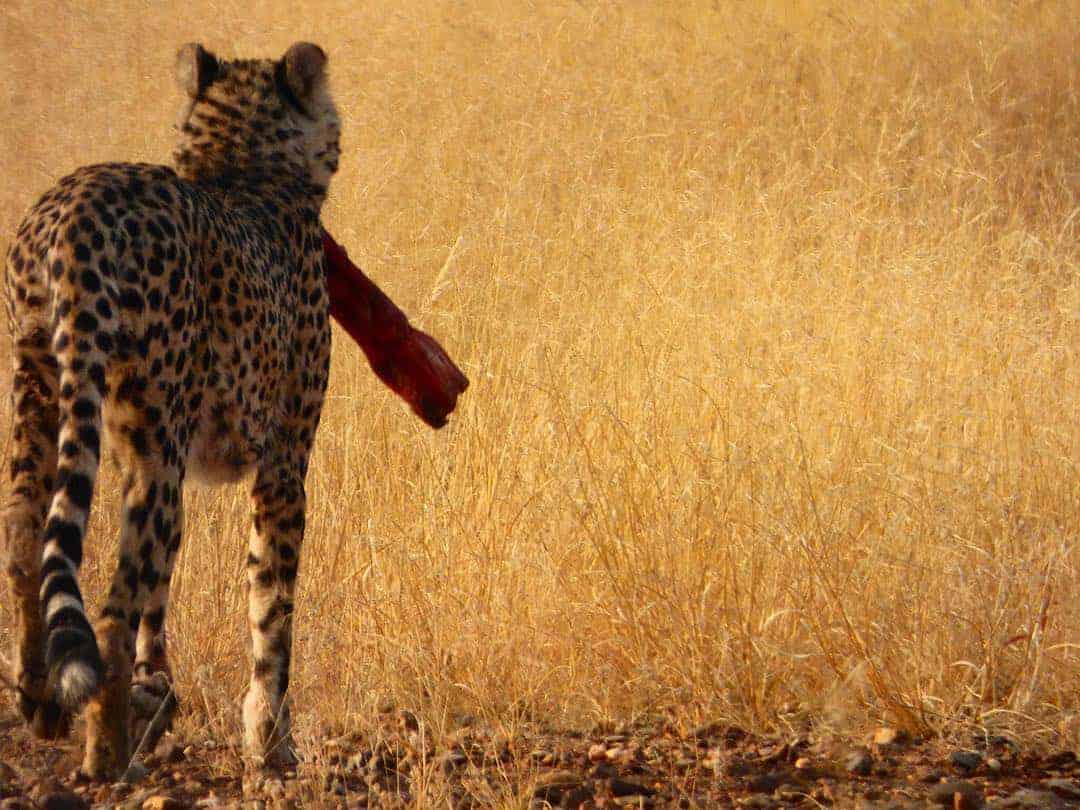

Wildlife photography is my favorite type of photography. Between the wild animals and the stunning landscapes they reside in, I could think of a better type of photography to try and perfect! (And if you want to know what are the best wildlife related holidays in the world -> Read This!)
.
Patience isn’t a virtue. It’s a necessity
Wild animals are well, wild. You don’t know where they are going to be, what behavior they will be displaying, or how long they are going to stick around for. This means that your shooting will be done in one of two ways. The first is to find a spot and stay there; the second is to keep moving and try and find the animals. Both require a an element of hope and a lot of time and patience, and then the ability to grab a shot at a split seconds notice when a photo opportunity presents itself. (Unless you visit Christmas Island for the Red Crab Migration when there are literally hundreds of thousands of crabs wandering around the island!)
.
Take a Zoom/Telephoto lens

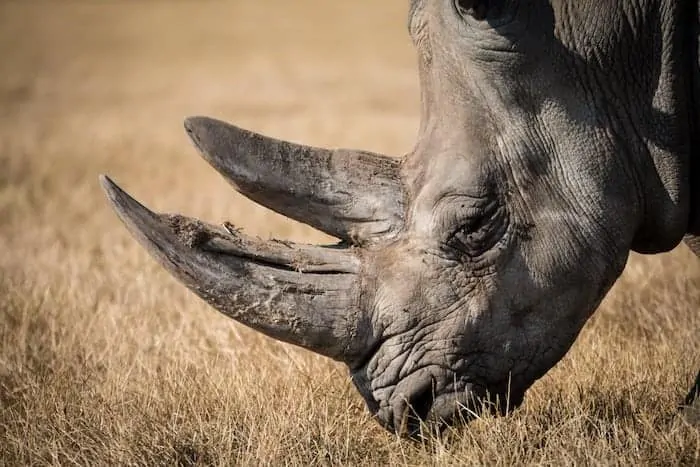 Again, the whole ‘wild’ element is key here and being wild, animals are often wary of humans and will attempt to stay as far away as possible. Having a good zoom lens is a necessity – and you don’t have to spend a fortune on a DSLR to get one. When I went to Africa I shot solely with the Lumix Fz70 Superzoom Bridge Camera (which I absolutely love) and it’s x60 optical zoom helped me to capture some incredible shots that I wouldn’t have been able to get otherwise.
Enjoy Yourself
This one isn’t unique to Wildlife or travel photography in general, but any type of photography shouldn’t be a chore, but something you enjoy. Shoot what you like, find joy in different places, details and styles and enjoy yourself!
.
These travel photography tips are just the starting point too! If you find your love of capturing beautiful images beginning to influence where and how you travel, it will certainly be worth your while to spend more time learning about your chosen style. In the meantime, these tips for travel photography should start you off in the right direction.
And if you liked this post please tweet, flip, G+, pin or share on Facebook – I’d really appreciate it!

READY MORE TRAVEL TIPS & INSPIRATION? YOU MIGHT BE INTERESTED IN THESE ARTICLES:
- General Inspo: Travel Quotes to Fuel Your Wanderlust
- Awesome Winter Sports Destinations: The Best Places to Ski in the Northern Hemisphere
- Explore Africa: There is so much more than just South Africa! Check out the Most Incredible Places to Visit in Africa and start exploring this incredible continent.
- Iceland: The Best Tours in Iceland (that are totally worth the price tag!)
- Festivals: Festival Fan? You’ll love these Incredible Festivals From Around the World
Hi There! Thanks for reading the MakeTimeToSeeTheWorld travel blog ultimate guide to 21 Travel Photography Tips to Help You Take Better Travel Photos! I just wanted to let you know that this travel guide contains affiliate links, which means if you purchase something after clicking a link, I may get a small commission – which is at absolutely no cost to you. If you enjoyed this article and are going to be searching for some of the things I mention anyway, I would love it if you could click through from the links above & thank you in advance! Read my full Disclosure here. And thank you for reading the MakeTimeToSeeTheWorld Travel Bloggers guest post.
John Hyatt
Wednesday 12th of June 2019
Hey, I am so glad to read your thoughts because I really enjoyed reading this. The way you explain your travel experience is truly awesome.
Himanshu
Monday 8th of October 2018
Great article! Blue and golden hour is best for photography and adding human element in the photograph will create depth and drama in the photography. Another thing we can do to create an amazing photo is shooting with different angle and height. Thanks
Olivia Green
Tuesday 5th of June 2018
Amazing tips, Vicki! I've always loved traveling but never thought of making it a source of income until recently. I've quite my routine job in order to become a travel photographer and these tips are definitely going with my on my first trip to Europe next month. Just one question, are the 18-55 kit lens and 10-20 wide angle lens enough for landscapes or do I need to upgrade my gear?
Vicki
Wednesday 6th of June 2018
Hi Olivia Glad you liked the tips. I would recommend getting to know your lenses as they are and working out their limitations for what you want/need before spending any money on upgrading your gear.